STEP BY STEP INSTALLATION OF LINUX MINT 18 (LINUX MINT CINNAMON) WITH SNAPSHOTS

STEP BY STEP INSTALLATION OF LINUX MINT 18 (LINUX MINT CINNAMON) WITH SNAPSHOTS
Introduction
In this article we are going to discuss on How to install Linux Mint 18 (Linux Mint Cinnamon). The Linux Mint 18.2 “Sonya” Cinnamon BETA Verion officially released on 6th June 2017 with some new features and updates. As per Linux Mint team this released version is a long term support and it will be supported till 2021 officially.
The Linux Mint 18.2 is based on ubuntu 16.04 which is a stable verion of Ubuntu. If you are currently using Linux Mint 18.1 then you can upgrade that to Linux Mint 18.2.
Now Linux Mint 18 BETA version is officially available for download. You can download it through torrent. To download the Linux Mint 18 installation ISO file click on below link.
CLICK HERE TO DOWNLOAD LINUX MINT 18.2
Follow the Below Steps to Install Linux Mint 18 (Linux Mint Cinnamon) Step by Step :
Let’s have a look at installation steps of Linux Mint 18 (Linux Mint Cinnamon) step by step with snapshots. The minimum requirement you need to install this version of Linux mint is you need 1 GB of RAM and atleast 20 GB of harddisk.
So to start the Installation process just enter your Installation DVD in DVD-ROM and keep the DVD-ROM as a first boot able device in BIOS to start the Linux Mint 18 process. the first screen you will able to see after starting installation is shown below. Here you just press enter to avoid the automatic boot as we will install it manually.
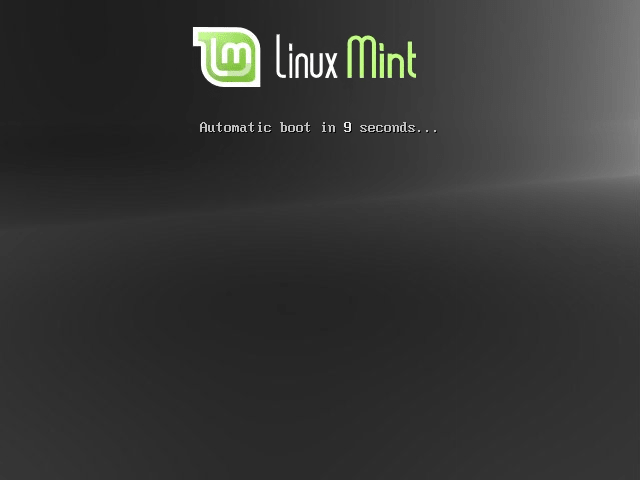
LINUX MINT 18 INSTALLATION STARTING
Then press ENTER on Start Linux Mint to start the Installation. This option will take to you to Linux Mint 18 portable screen.
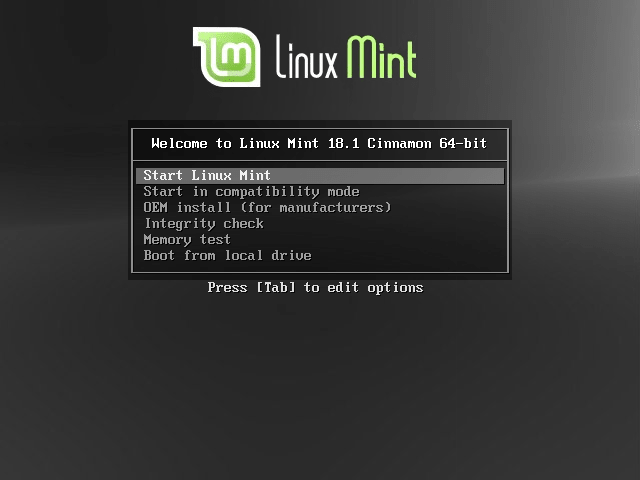
SELECT THE LINUX MINT 18 INSTALLATION TYPE
As you can see on snapshot below the Linux Mint Installation is Loading.

LINUX MINT 18 INSTALLATION IS LOADING
As I discuss earlier Here we are in portable Desktop of Linux Mint 18. The benefit of this portable feature is you can use the complete Linux Mint operating system without installing it.
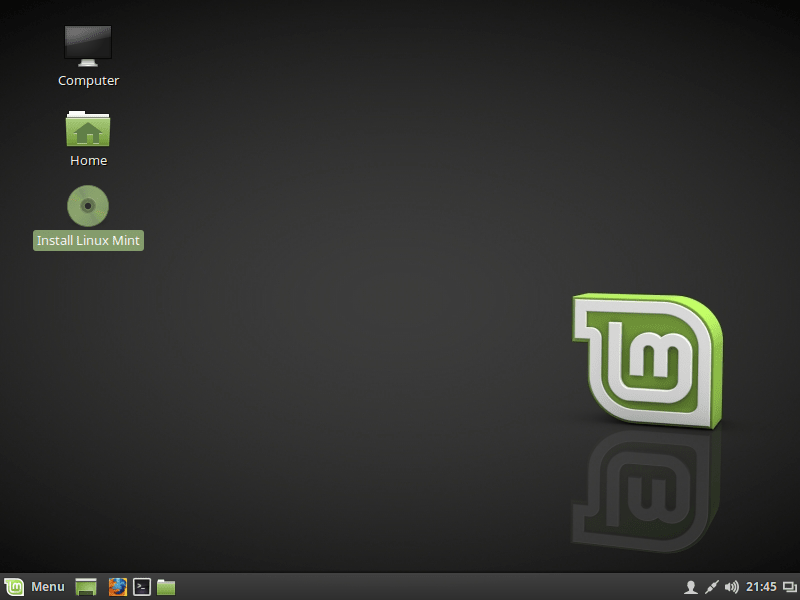
PORTABLE DESKTOP OF LINUX MINT 18
So Let’s go ahead and start the actual installation process of Linux Mint. To start the installation just right click on Install Linux Mint DVD-ROM and click on Open.
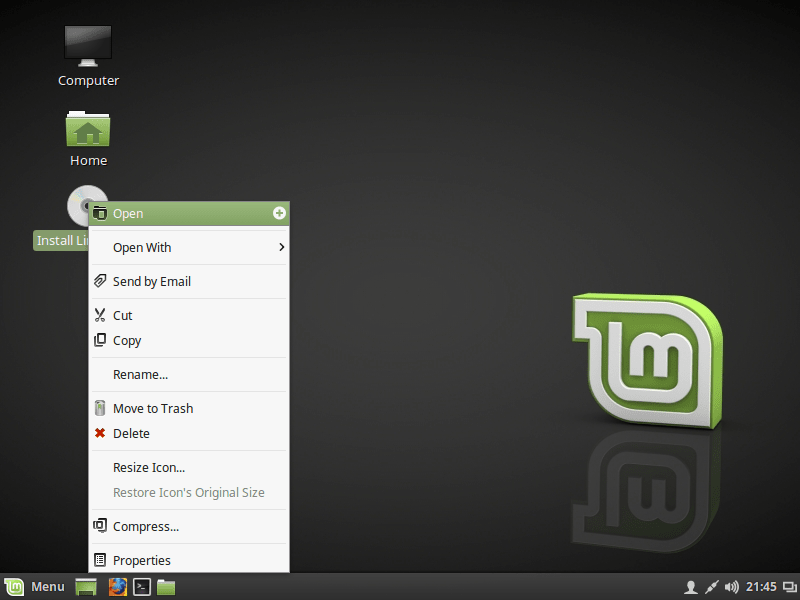
START THE LINUX MINT INSTALLATION
On next screen Select the Language you would like to prefer. Here I am selecting English. Then click on Continue.
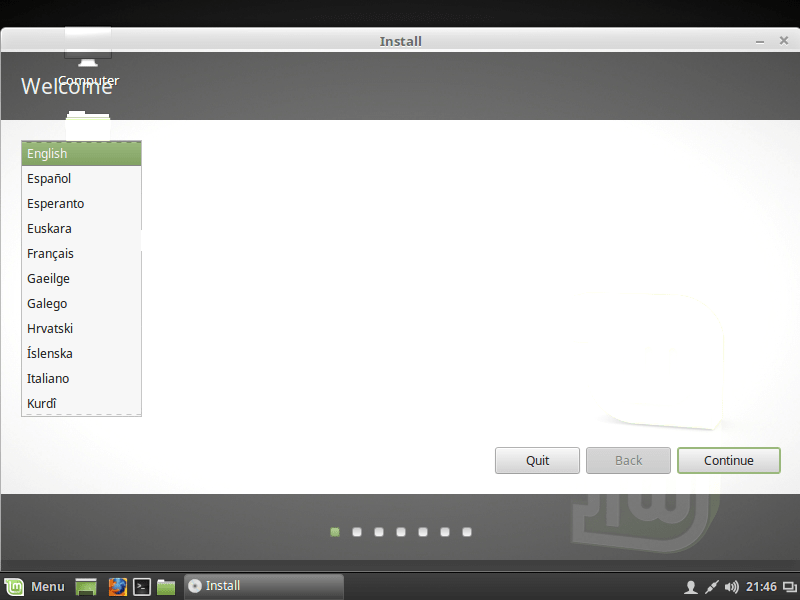
SELECT LANGUAGE
If you want to install Third Party Drivers or Software’s you can tick on below option i.e. Install third-party software graphic and Wi-Fi hardware, Flash, MP3 and other media. Here I am not going to install any third party drivers or application’s, So I am continuing the installation without using this option. Hence click on Continue.
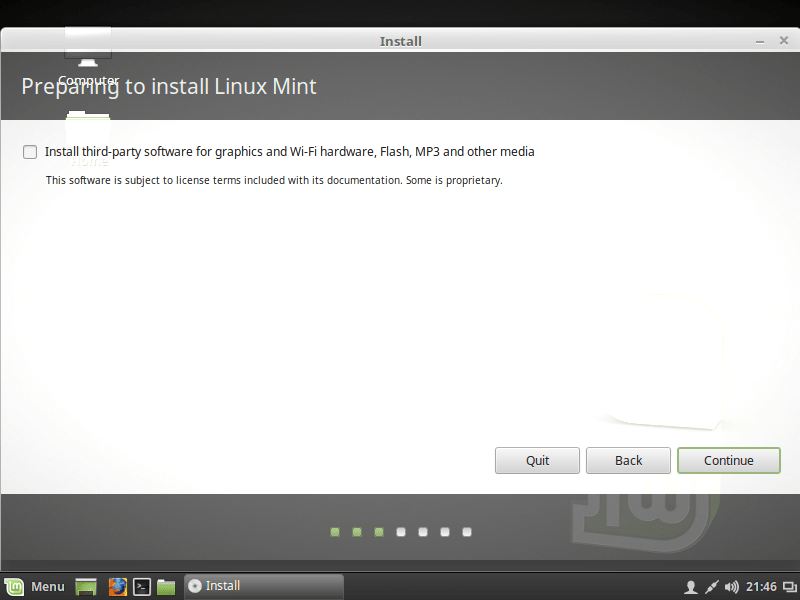
CONTINUE LINUX MINT CINNAMON INSTALLATION
Now it’s time to create partition’s for Linux Mint 18 operating system. Here you will get so many options to create partitions like you can allow the system to select the hard disk and create partitions automatically, You can create LVM partitions or you can create partitions manually as per your requirement.
Here I am going to create partitions manually so that I can show you how to create partition in Linux mint during installation. So to create partition manually just select the option Something else and then click o Continue.
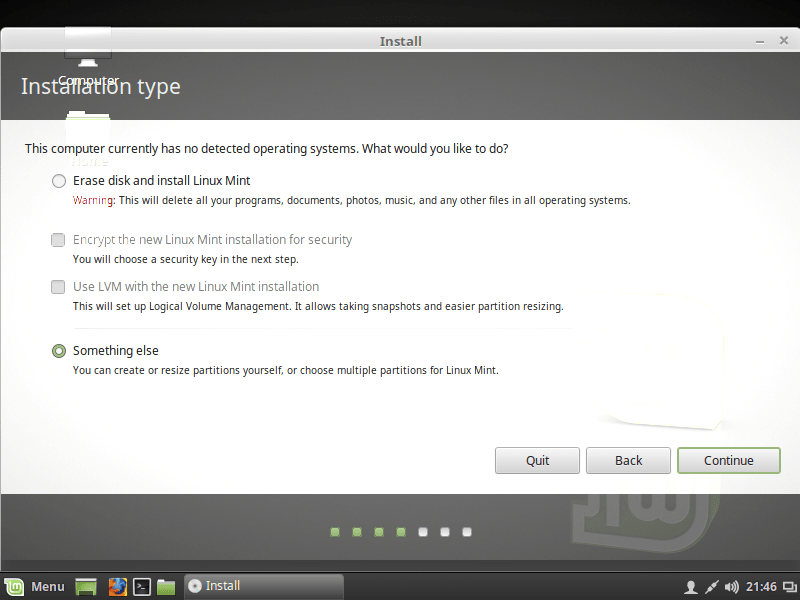
CREATE PARTITION MANUALLY
Here select the hard disk in which you want to create partitions and then click on Install Now.
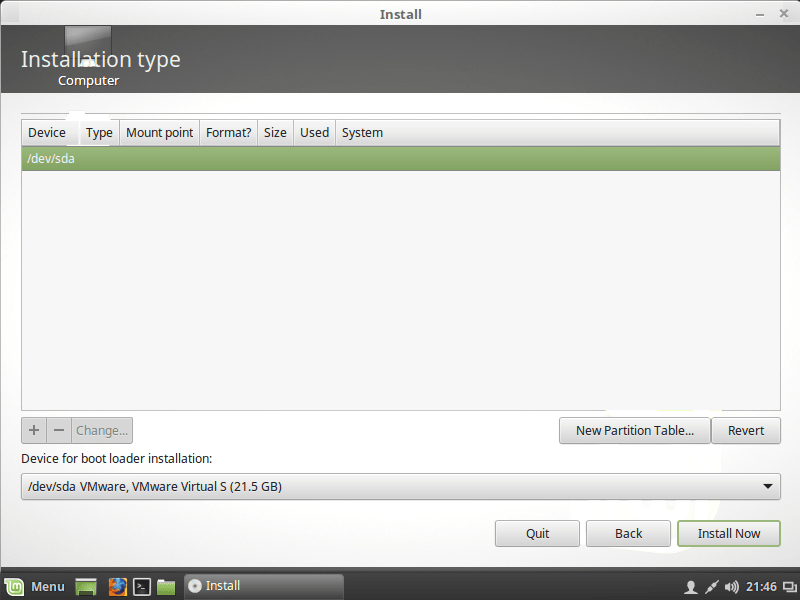
SELECT DISK TO CREATE PARTITION
Here system is asking to confirm if you want to create partition on entire selected disk and giving a warning that all your currently available partitions with get deleted. So as I am going to create partition in this hard disk, so I will click on Continue to proceed the Linux Mint 18 Installation further.
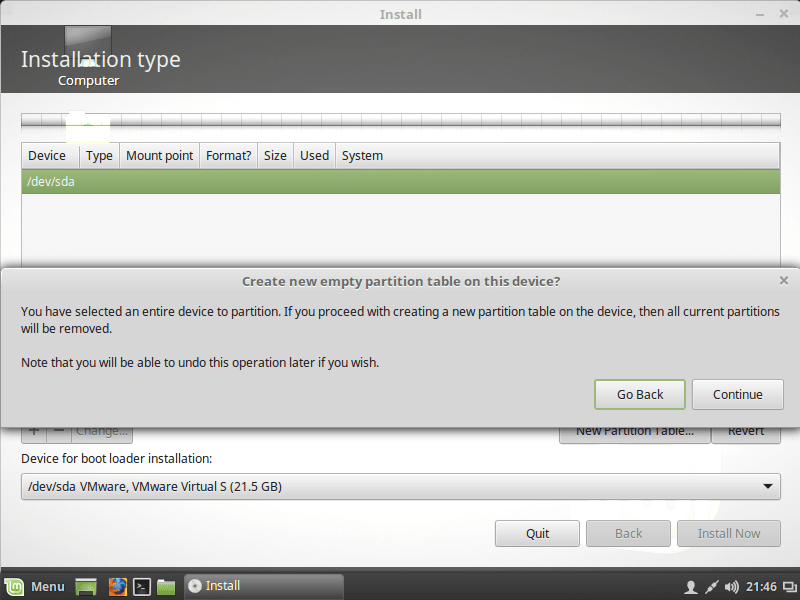
CONTINUE PARTITION CREATION FOR LINUX MINT 18
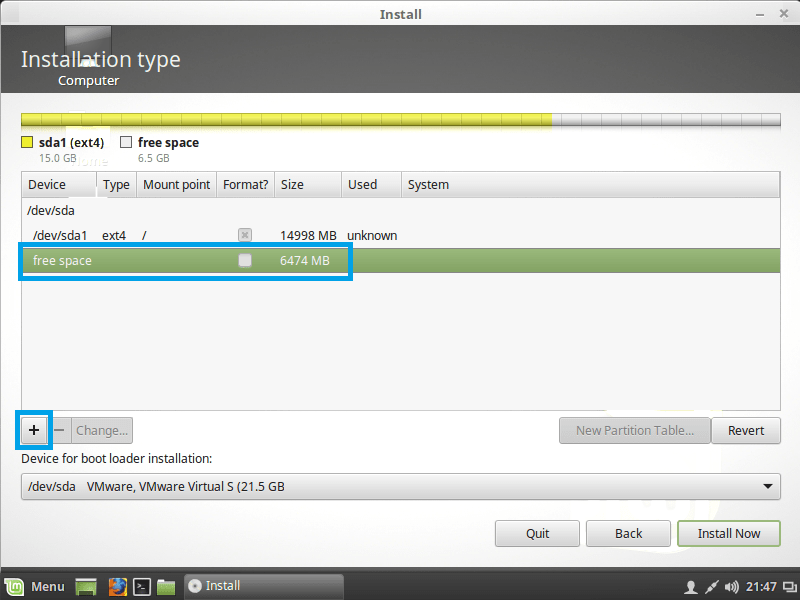
Now our hard disk is ready to create partitions. So select the available free space and then click on “+” sign to create your first partition. Here I am going to create two partitions i.e. / Partition and swap Partition. So let’s go ahead and create / partition by click on “+” sign.
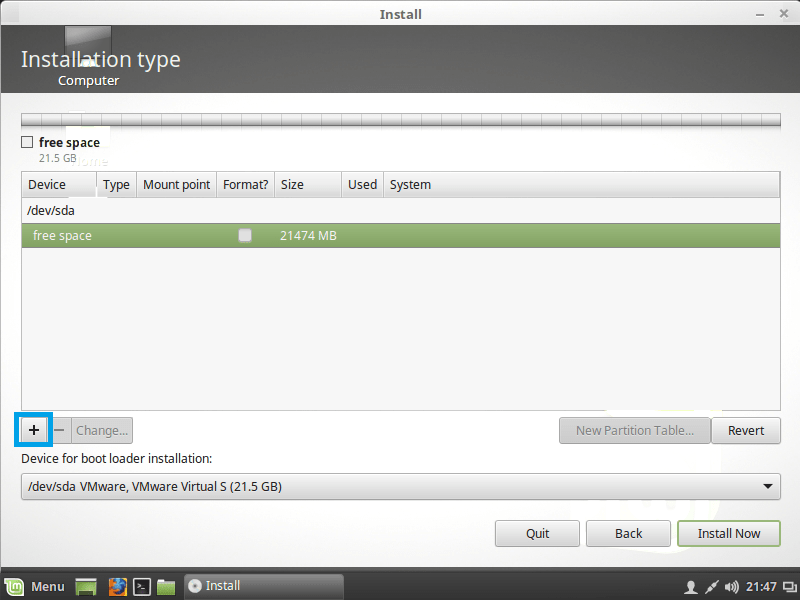
CREATE FIRST PARTITION
Also Read :
- STEP BY STEP INSTALLATION OF CENTOS 7 WITH SCREENSHOTS
- STEP BY STEP INSTALLATION OF LINUX DEBIAN 9 STRETCH WITH SNAPSHOTS
- HOW TO INSTALL KALI LINUX VERSION 2017.1
Here you have to select some settings for your / Partition. The options with explanations are :
- Size : Enter the size you want to assign for / Partition. Here I am assigning 15 GB.
-
Type for the new partition : Here select the type of Partition you want to create i.e either Primary or Logical. Here I am selecting Primary Partition.
- Primary Partition : This type of partition is called as system partition where we can install the operating system. You can create maximum 4 primary partitions in a single hard disk.
- Logical Partition : This type of partition is used to store data on Hard disk.
- Location for the new Partition : Here you have to select location for the new partition in hard disk. Location in the sense where you want to keep this partition in hard disk at beginning of this space or at end of this space. Here I am selecting Beginning.
- Use as : Here select which File System you want to use for this partition. I am selecting Ext 4. You can select any other File System from drop down list.
- Mount Point : Select the mount point for the partition.
After all required changes click on OK.
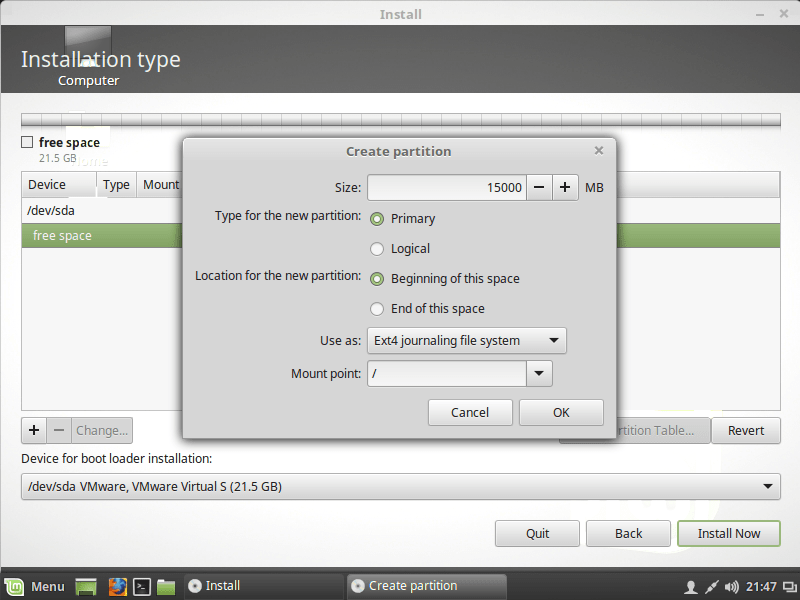
CREATING ROOT PARTITION
So we have created our first partition i.e /. Now let’s go ahead and create our second partition i.e. swap partition. For that we have to follow the same step as we created the first partition. So select the free space and click on “+“.
CREATE SECOND PARTITION
Here you can do required settings as per your requirement. As here I am creating swap partition there are two main changes i would do.
The first one is How much space we should assign to a swap partition. As per rule we should assign double size of physical memory that we have in our system to a swap partition. Here I am have 2 GB of physical memory in my system so 2 GB x 2 = 4GB. So here I am giving 4096 MB to my swap partition. and the second one is select file system as a swap area. all other settings you can leave as default.
After all required changes click on OK.
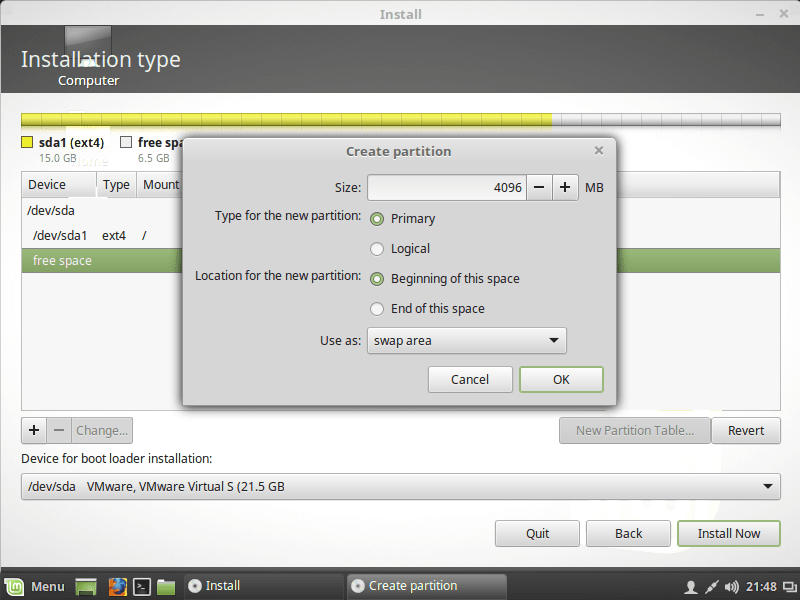
CREATING SWAP PARTITION
So we are done with our partition creation. As you can see on snapshot below we have created two partitions. Now just click on Install Now to continue the Linux Mint installation further.
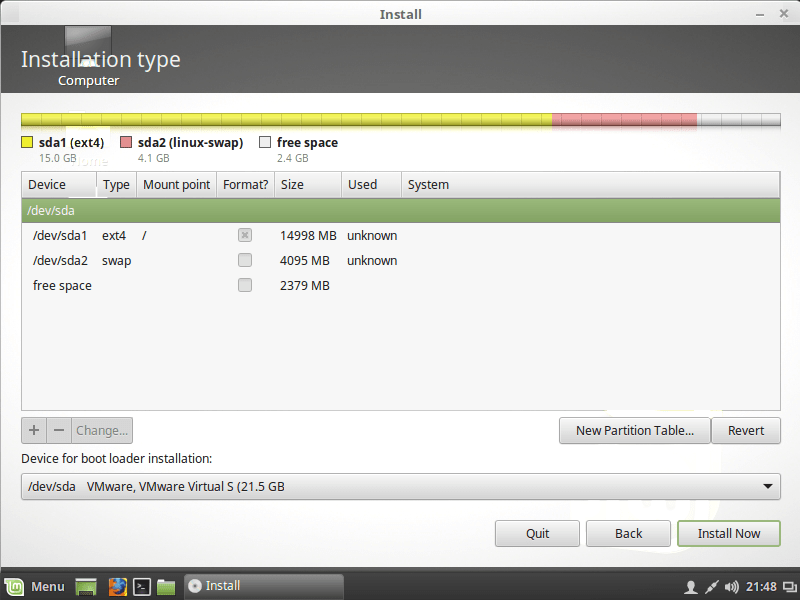
FINISH PARTITION CREATION
Click on Continue to allow the system to write changes in disk.
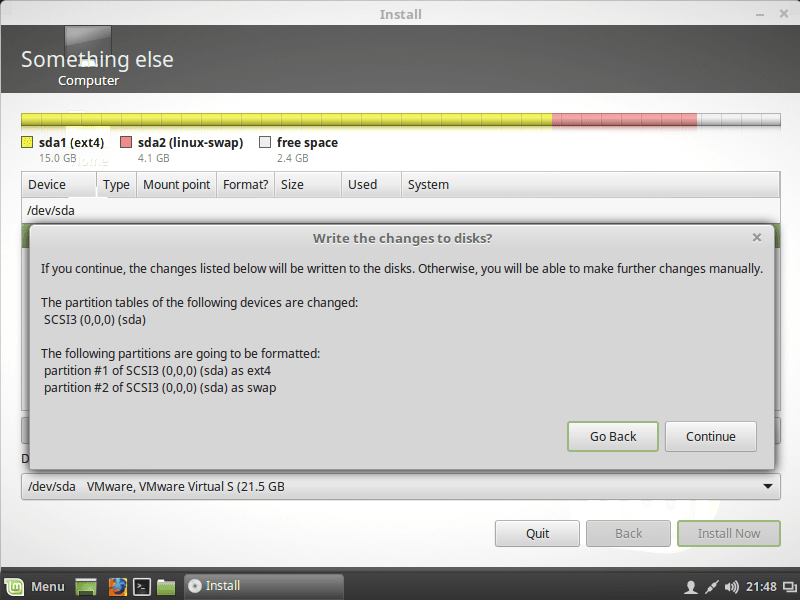
WRITE CHANGES TO DISK
Here select the Time Zone as per your location. then click on Continue.
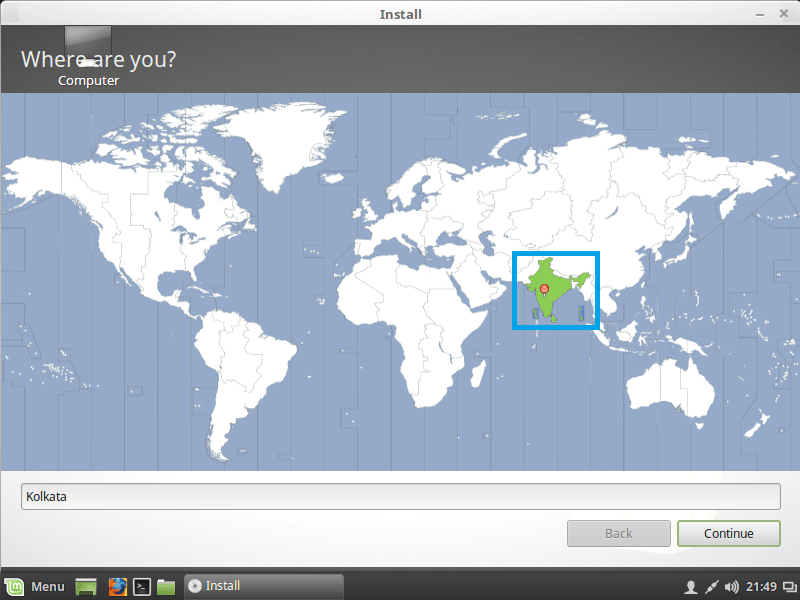
SELECT TIMEZONE FOR LINUX MINT 18
On our next step select language for Keyboard and then Click on Continue.
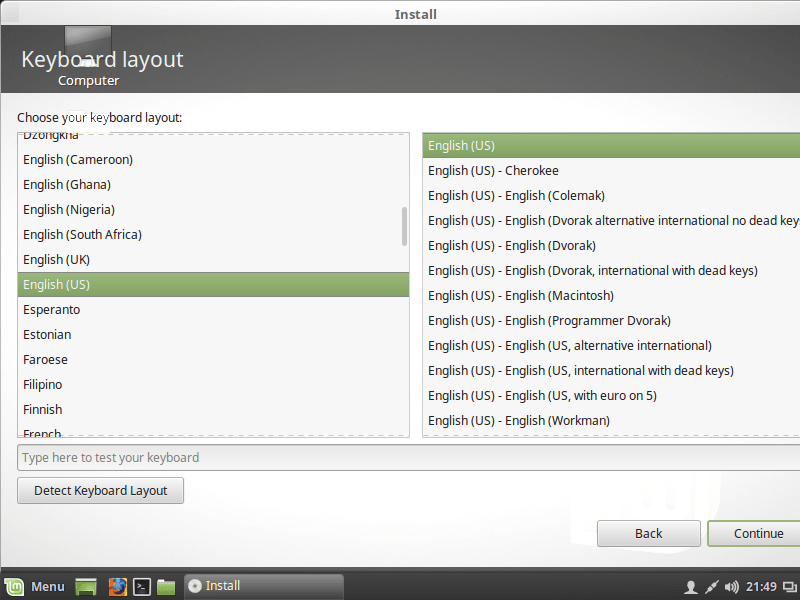
CONFIGURE KEYBOARD SETTING
Now we have to create a user to login Linux Mint 18 system.
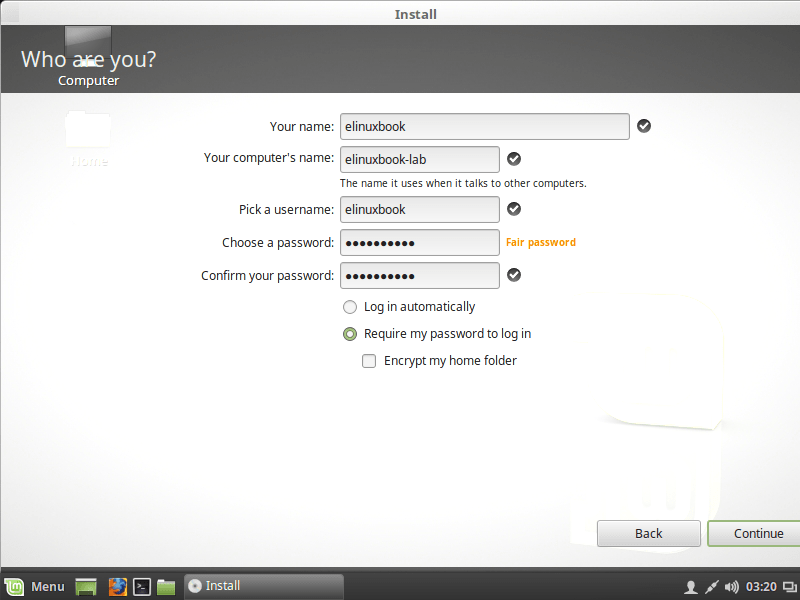
CREATE A USER FOR LINUX MINT 18
Linux Mint 18 installation is on progress.
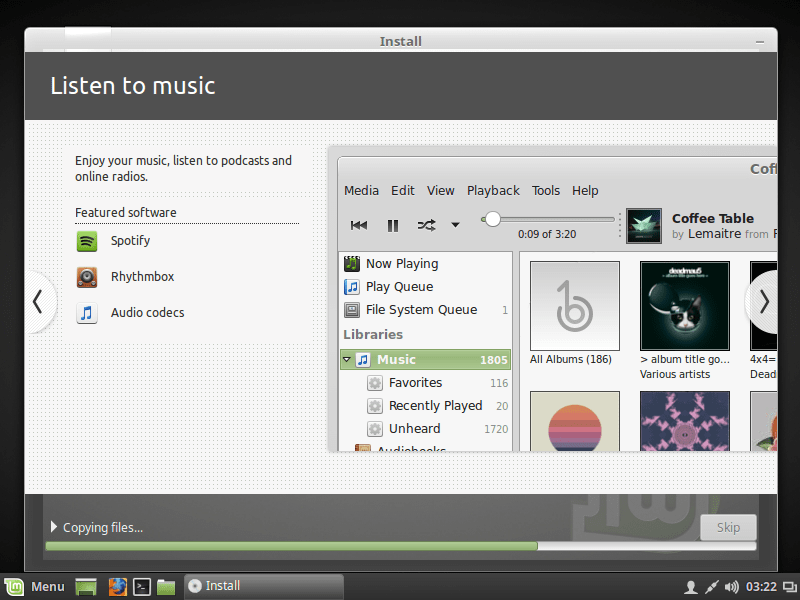
COPYING INSTALLATION FILES
Now restart the system to complete the installation of Linux Mint 18
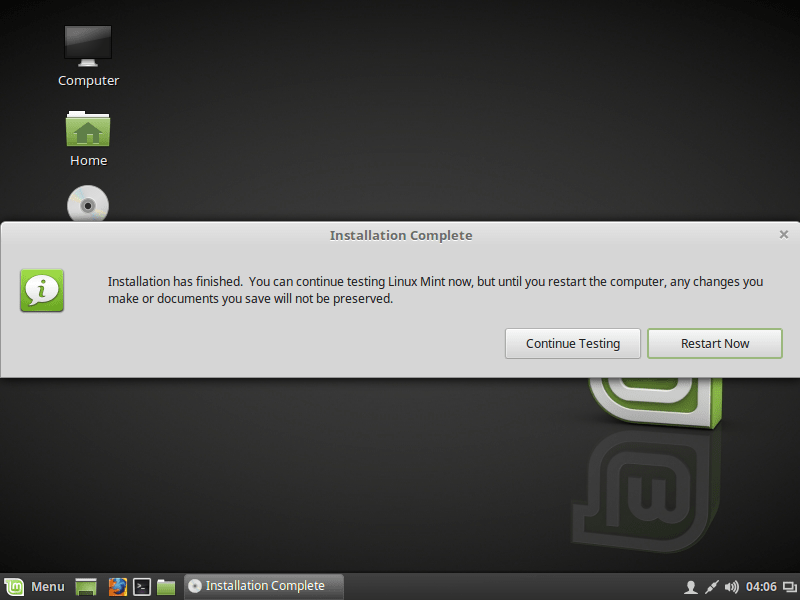
RESTART TO COMPLETE THE LINUX MINT 18 INSTALLATION
Here system is asking to remove the installation media as we have completed the installation of Linux Mint 18. then press Enter.

REMOVE LINUX MINT 18 INSTALLATION MEDIA
Now we are at login screen of Linux Mint. Here just click on the user to Login in to the system.
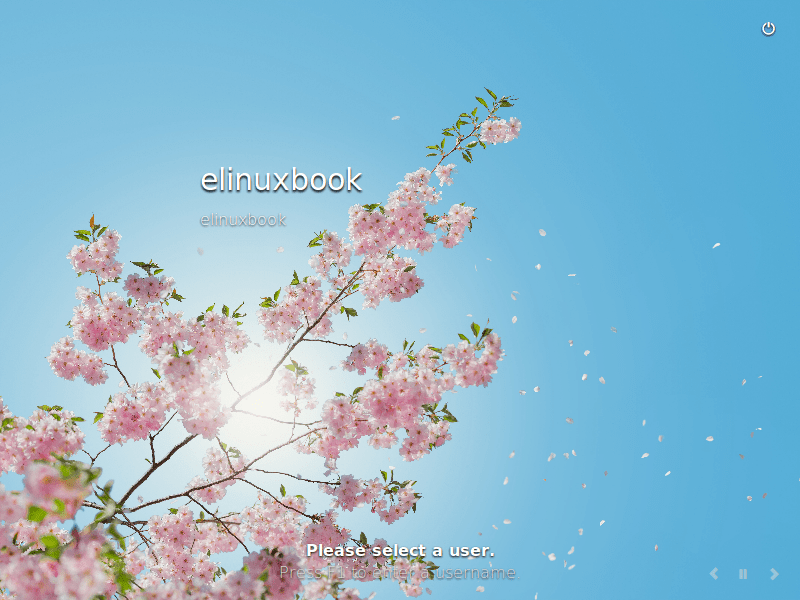
LINUX MINT 18 LOGIN PAGE
Enter Username and Password to login in to the system.

ENTER USERNAME & PASSWORD TO LOGIN
Welcome Screen of Linux Mint 18.

LINUX MINT 18 WELCOME SCREEN
Desktop of Linux Mint.
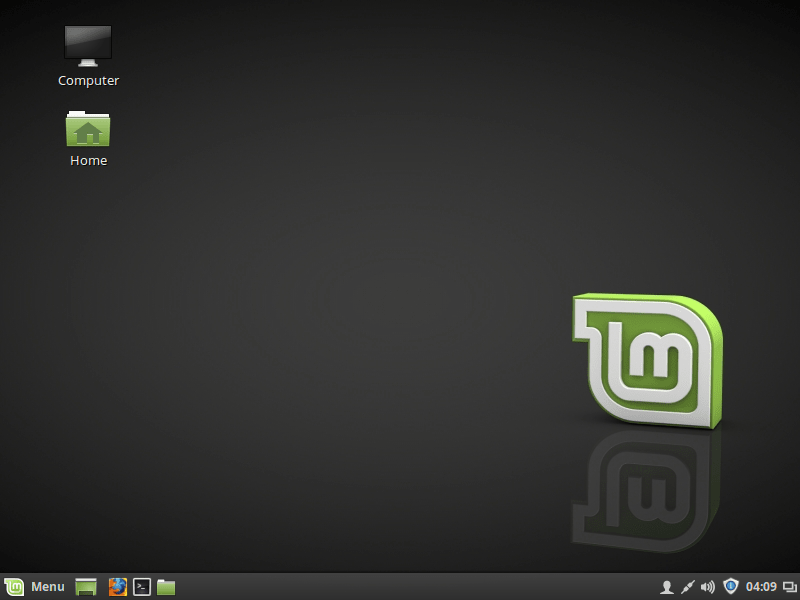
LINUX MINT 18 DESKTOP
This is how we can install Linux Mint 18 (linux mint cinnamon). If you found this article useful then Like Us, Share Us, Subscribe our Newsletter OR if you have something to say then feel free to comment on the comment box below.