HOW TO INSTALL LAMP STACK ON UBUNTU 16.04

Install LAMP Stack on Ubuntu 16.04
What is LAMP Stack?
LAMP Stack is nothing but a group of open source softwares or applications for the purpose of web development/PHP application development which we can install in Linux Operating System.
LAMP Server is combination of below open source resources/applications :-
Linux Operating System + Apache Web Server + MySQL Database Server + PHP Language
Similarly we have WAMP (Windows + Apache + MySQL + PHP) for Windows and XAMPP (X-OS + Apache + MySQL + PHP + PERL) for other Operating System or Cross Platform.
Main advantages of LAMP Stack is it’s a package of powerful applications for web-development and all applications are open source and freely available to download but have to pay for professional tools. It is also call as FOSS (Free or Open Source Software). We can use LAMP Serevr to Install other Opensource Application like WordPress.
So Let’s have a look at steps on how to install LAMP on Ubuntu 16.04.
Step: 1 Update the System
We need to install 4 Packages to install LAMP Stack i.e. Apache Webserver, My SQL Database Server, PHP and PHP MyAdmin.
Before Install above packages Let’s install/update newer version of packages and their dependencies of Ubuntu 16.04.
So update the packages by below command.
$ sudo apt-get update # To update Packages and their Dependencies.

Update Ubuntu 16.04
As shown on above snapshot all packages are now up to date, Now use below command to Install Apache Web Server.
$ sudo apt-get install apache2 # To install Apache Web Server
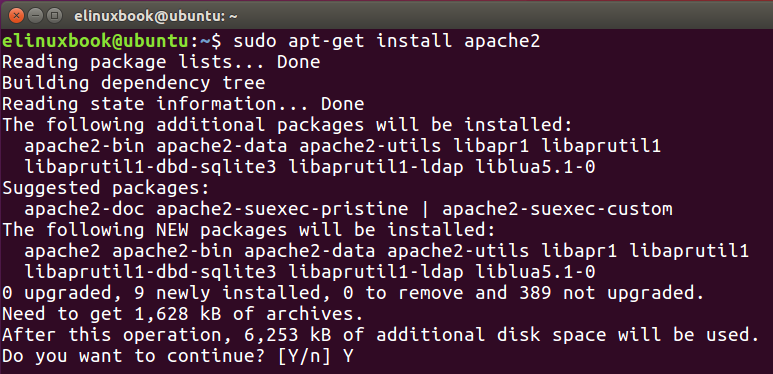
Install Apache2 Package
Now it’s asking to Enter “Y” to proceed for further installation, So press “Y”

Apache2 Installed Successfully
As we can see above the apache2 Package installed successfully, We can verify if apache2 package is installed or not by below command.
$ sudo dpkg -l apache2 # To verify apache2 package is installed or not

Checking if is apache2 installed or not by dpkg command
As per snapshot above the apache2 package is installed.
Now open the Web-Browser and enter “localhost” to check apache2 default page is showing or not.
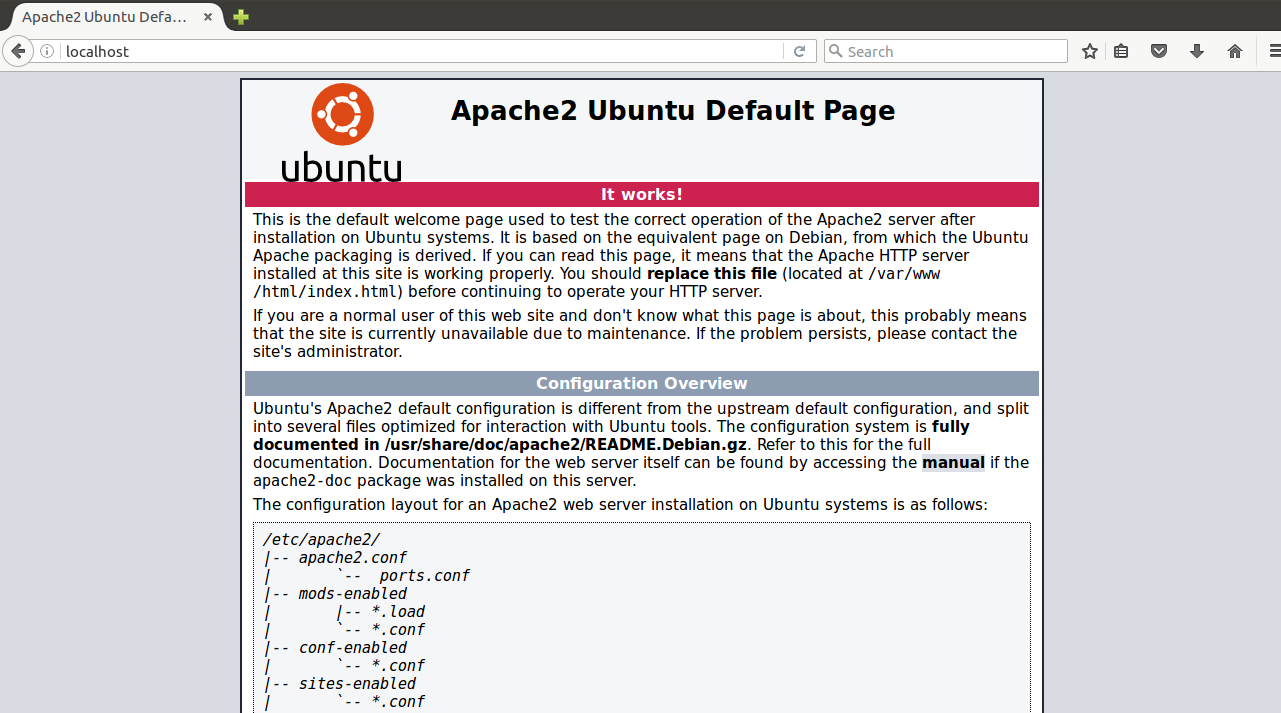
Accessing Apache Default Page
So apache web service is working fine as shown on the snapshot above.
Step: 2 Install PHP Package
As we know that LAMP Stack is a open source application which is used to host PHP based websites, So for that let’s go ahead and install php by below command.
$ sudo apt-get install libapache2-mod-php php # To install php package
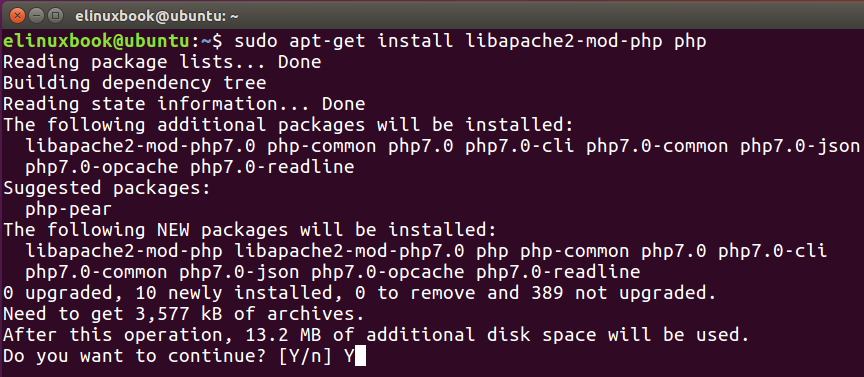
Installing PHP
Now it’s asking to Enter “Y” to proceed for further installation, So press “Y”

PHP Installed Successfully
As we can see above the php package installation process has been completed, We can verify if php package is installed or not by below command.
$ sudo dpkg -l php # To check PHP package is installed or not

Checking if is php installed or not by dpkg command
As we can see above php is installed, now restart the apache2 service to take effect by below command.
$ sudo /etc/init.d/apache2 restart # To restart the apache2 service

Restart Apache2 Service
Now let’s go ahead and test if php is working properly or not, for that create a file under Document Root of apache i.e. “/var/www/html” and then enter “<?php phpinfo(); ?>” to check php information.
Follow the below steps to do the same :-
$ sudo nano /var/www/html/file.php # To create a file.php file
Enter the below code in file to check if php is working fine and then save.
<?php phpinfo(); ?> # to check the PHP Information
Note: I prefer “nano” as a text editor, you can use “vi” or any other text editor.

Create a PHP File
Restart the apache2 service then open the web browser and then enter “http://localhost/file.php”
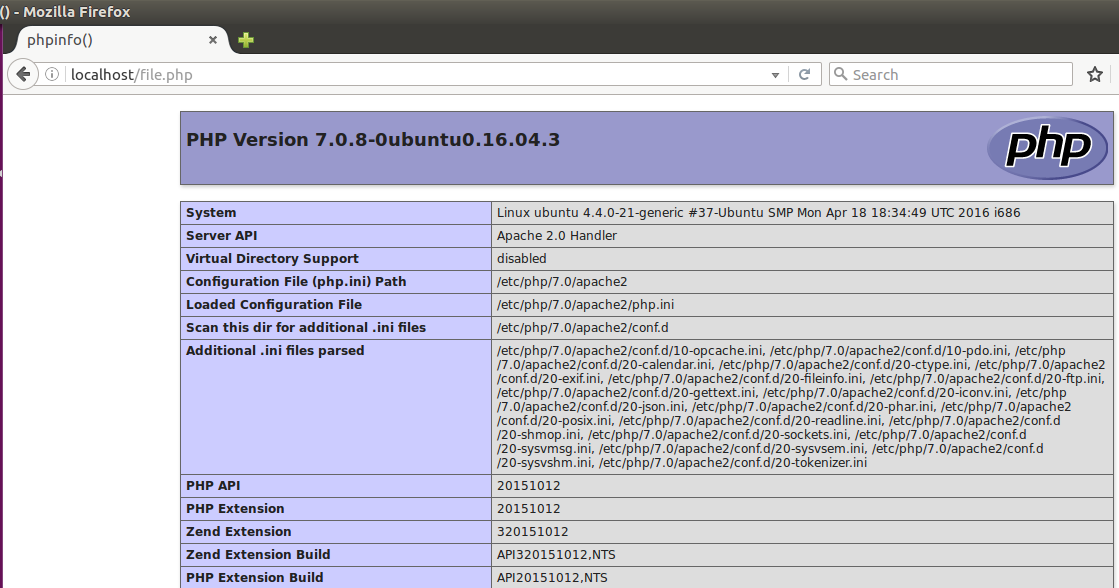
Accessing PHP Information to Testing PHP
PHP is working fine as shown on the above snapshot.
Step: 3 Install Mysql Server Package
Now it’s time to install mysql-server, follow the below command to install the same.
$ sudo apt-get install mysql-server # To install mysql-server
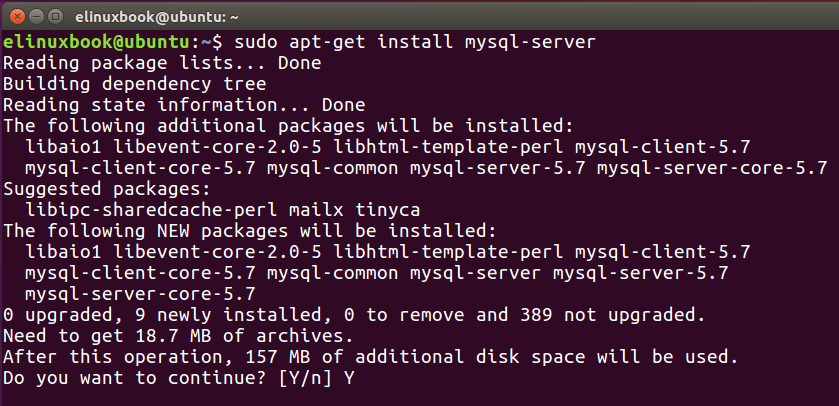
Installing MySQL Server
As shown above on the snapshot its asking to enter “Y” to proceed the installation process, So enter “Y“.

Set Password for MySQL Server
Now its asking to set the password for mysql-server login for the user “root“.
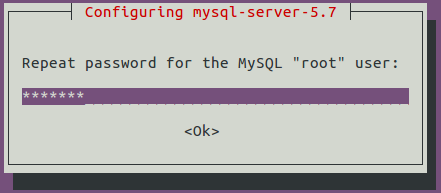
Confirm Password for MySQL Server
Confirm the password by Re-Entering the same password.

MySQL Server Installed Successfully
mysql-server installation process has been completed, we can verify if mysql-server package is installed or not by below command.
$ sudo dpkg -l mysql-server # To check if mysql-server package is installed or not

Checking if is MySQL Server installed or not by dpkg command
As we can see on the snapshot above mysql-server package is installed, let’s check if mysql-server is working properly by creating a database, Please follow the below steps to do the same.
$ mysql -u root -p # To login mysql-server as a user root
After above command it will ask to enter password for mysql-server, now here enter the password which we have set during mysql-server installation process.
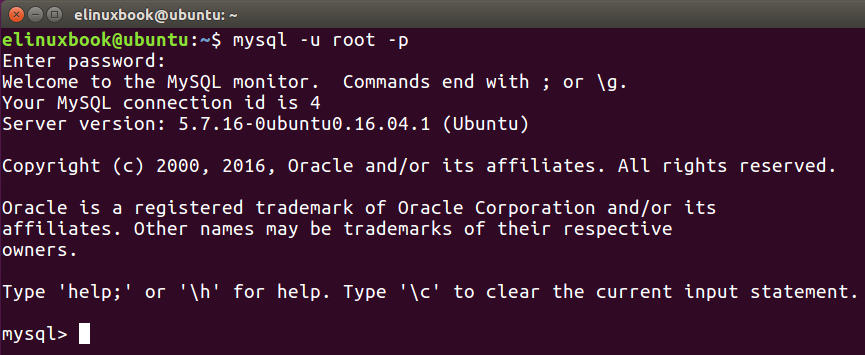
Create a Database in MySQL Server
As we can see above mysql-server logged in successfully and the prompt changed to “mysql>“.
Now enter the below command to create a database on “mysql>“ prompt.
mysql> create database usersdb; # To create a database

Database Created Successfully
As shown above on the snapshot the database named “usersdb” created successfully.
Now to verify if database created or not enter the below command.
mysql> show databases; # To create a database
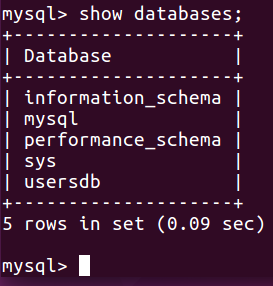
Listing Created Databases
As we can see on above snapshot the database “usersdb” created successfully.
Step: 4 Install PhpMyAdmin Package
Now let’s go ahead and install our last package for LAMP Stack i.e phpmyadmin by using below command.
$ sudo apt-get install phpmyadmin # To install phpmyadmin
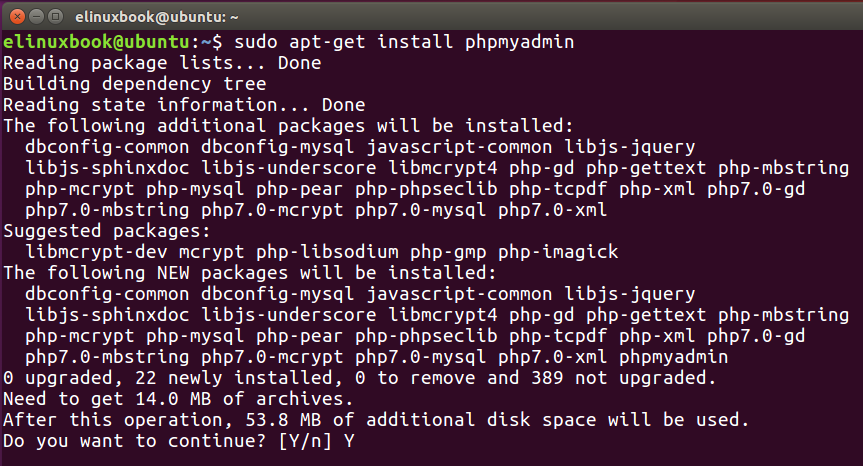
Installing PHPMyAdmin
As shown above on the snapshot its asking to enter “Y” to proceed the installation process, So enter “Y“.
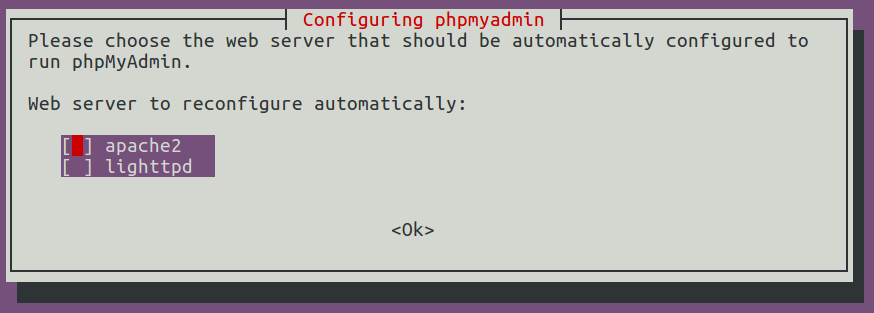
Select apache2 to work with PHPMyAdmin
Select apache2 and then press OK to proceed the installation process further as shown on the snapshot above.
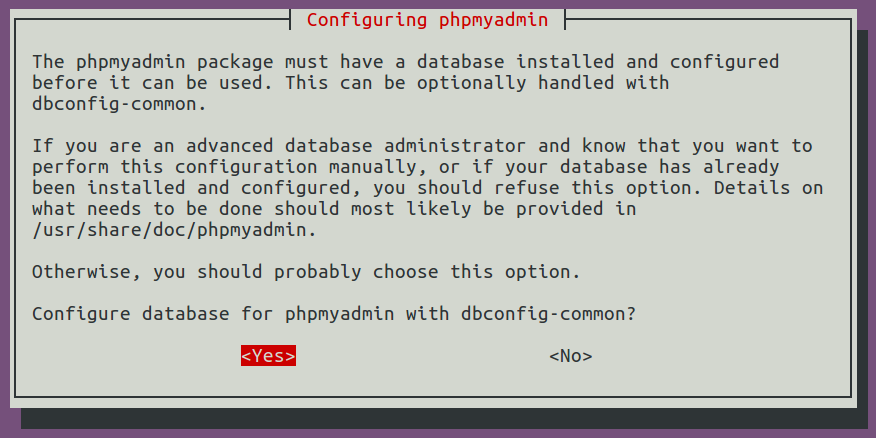
Allowing PHPMyAdmin to create Database in MySQL Server
Press “Yes” to Configure database for phpmyadmin with dbconfig-common.

Set Password for PHPMyAdmin
Now set password for phpmyadmin login purpose for user “root”.
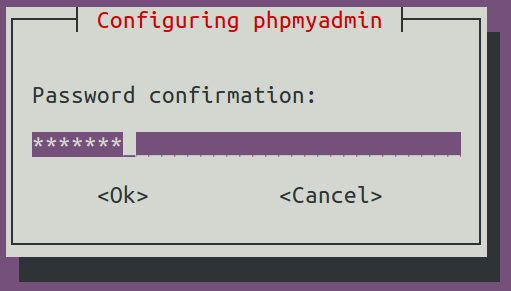
Confirm Password
Confirm the password by Re-Entering the same password.

PHPMyAdmin Installed Successfully
As we can see above phpmyadmin installed successfully, now use below command to verify phpmyadmin package installed or not.
$ sudo dpkg -l phpmyadmin # To verify if phpmyadmin package installed or not

Checking if is PHPMyAdmin installed or not by dpkg command
As shown on above snapshot phpmyadmin package installed.
We can open phpmyadmin webaccess by using URL “http://localhost/phpmyadmin” but before that we have to configure “php.ini” and “apache.conf” file, So Follow the below steps to do the same.
edit the “php.ini” and search for extension=msql.so
$ sudo nano /etc/php/7.0/apache2/php.ini # To edit the php.ini file
Note:- “php.ini” file location may be different as per version
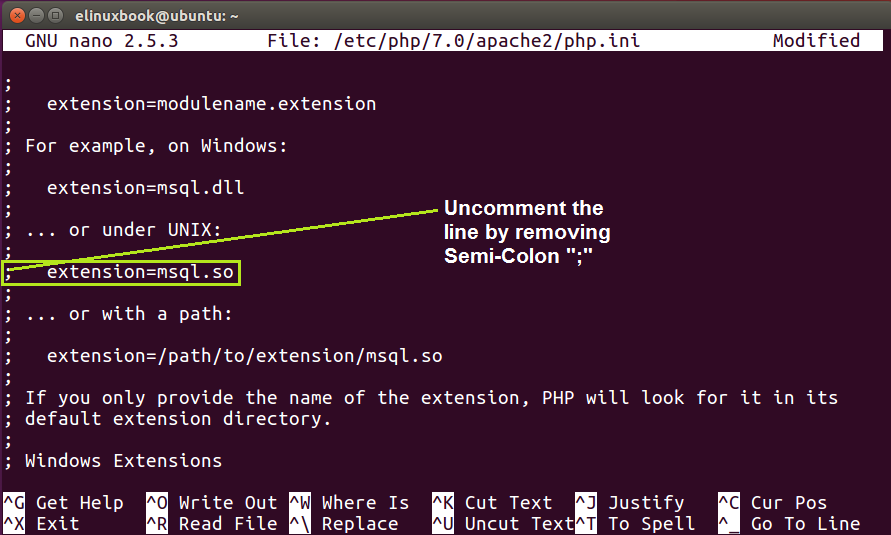
Configuring PHP for Apache2
Now search for extension=msql.so and Uncomment the line by removing the Semi-Colon as highlighted above on the snapshot.
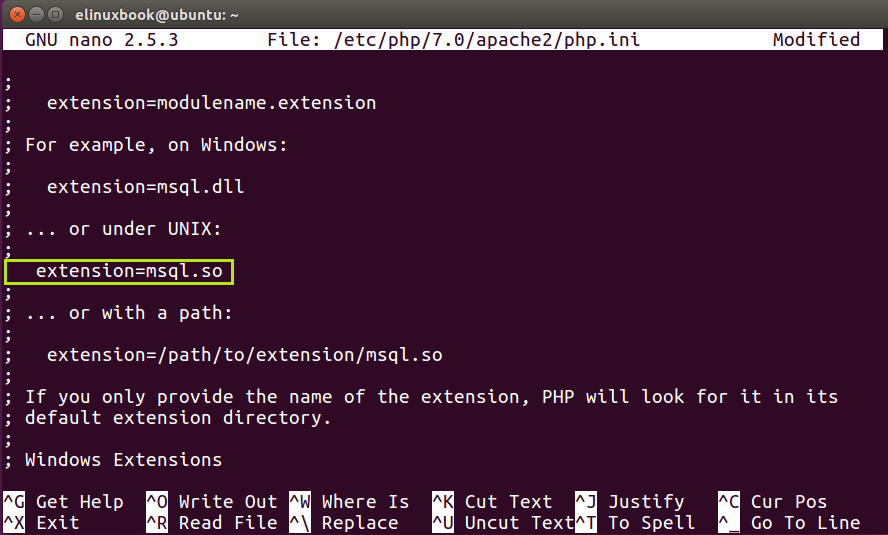
Configuring PHP for Apache2
After uncomment extension=msql.so it would look like this as shown above on the snapshot, then save php.ini file.
Now edit the “apache2.conf” file by using below command.
$ sudo nano /etc/apache2/apache2.conf # To edit the apache2.conf file
Then go to the end of the configuration file and add the below line.
Include /etc/phpmyadmin/apache.conf
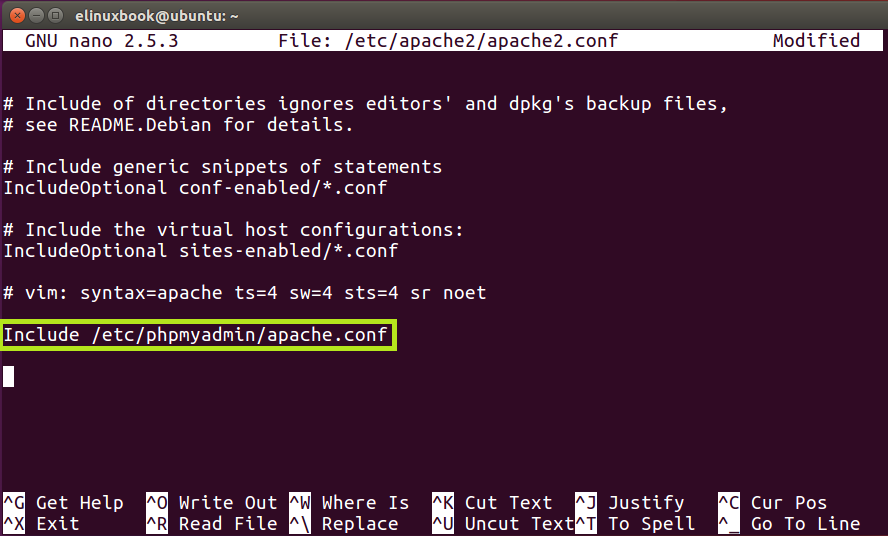
Configuring Apache2 to work with PHPMyAdmin
Please refer the above snapshot to do the changes in “apache2.conf” file then save the file.
Now restart the apache2 service.

Restart the Apache2 Service
Now open PhpMyAdmin web access by entering the below URL on web browser.
http://localhost/phpmyadmin
OR you can access on other system which should be in same network by entring below URL.
http://<IP Address of the LAMP Server>/phpmyadmin
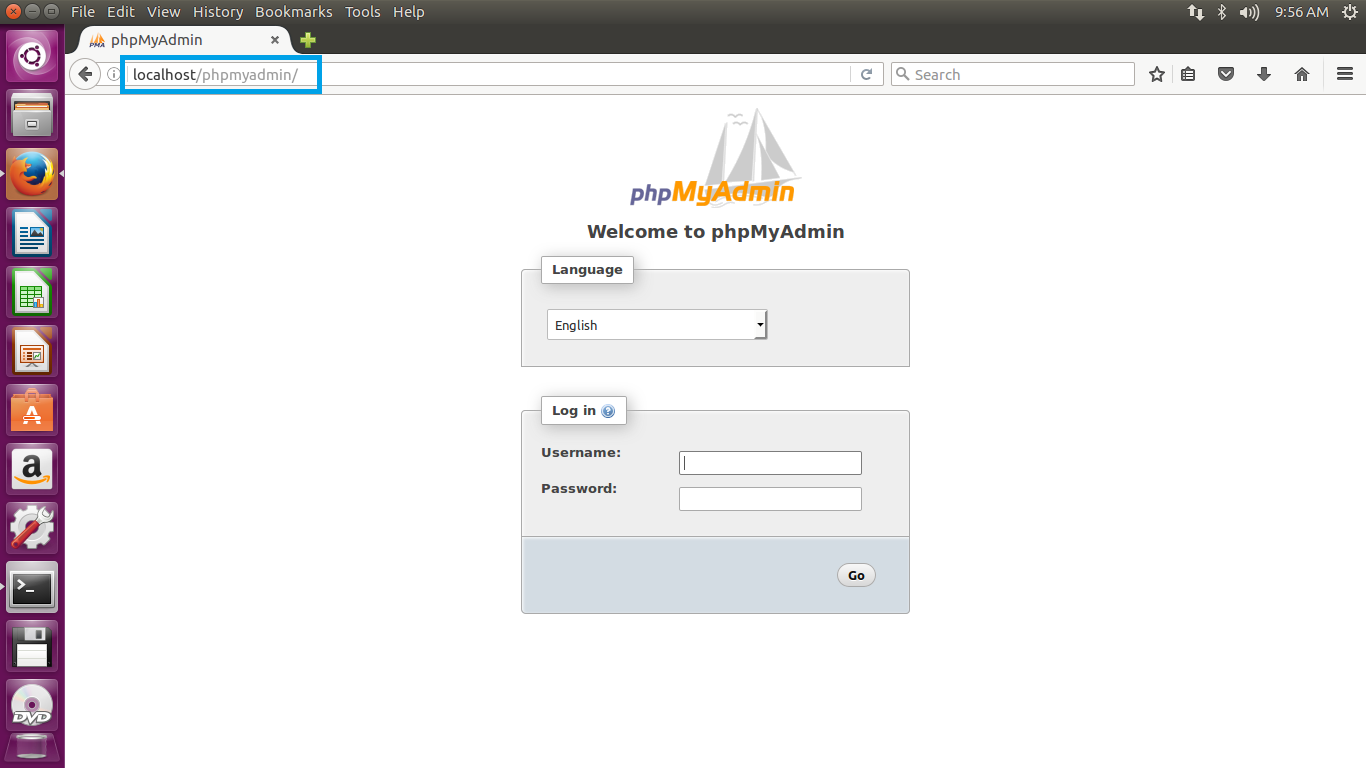
Accessing PHPMyAdmin Web Access
As we can see nice phpmyadmin web access on snapshot above, now login it by using username as “root” and use the password we have set during phpmyadmin package installation.
Refer the Snapshot below.
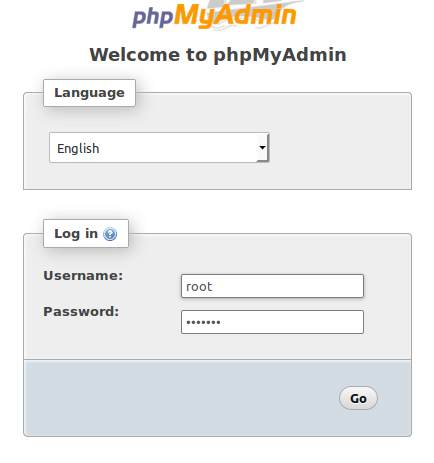
PHPMyAdmin Login Screen
Now as we can see below on the snapshot the phpmyadmin web access successfully logged in and showing the database we have created in mysql-server named “usersdb” highlighted below.
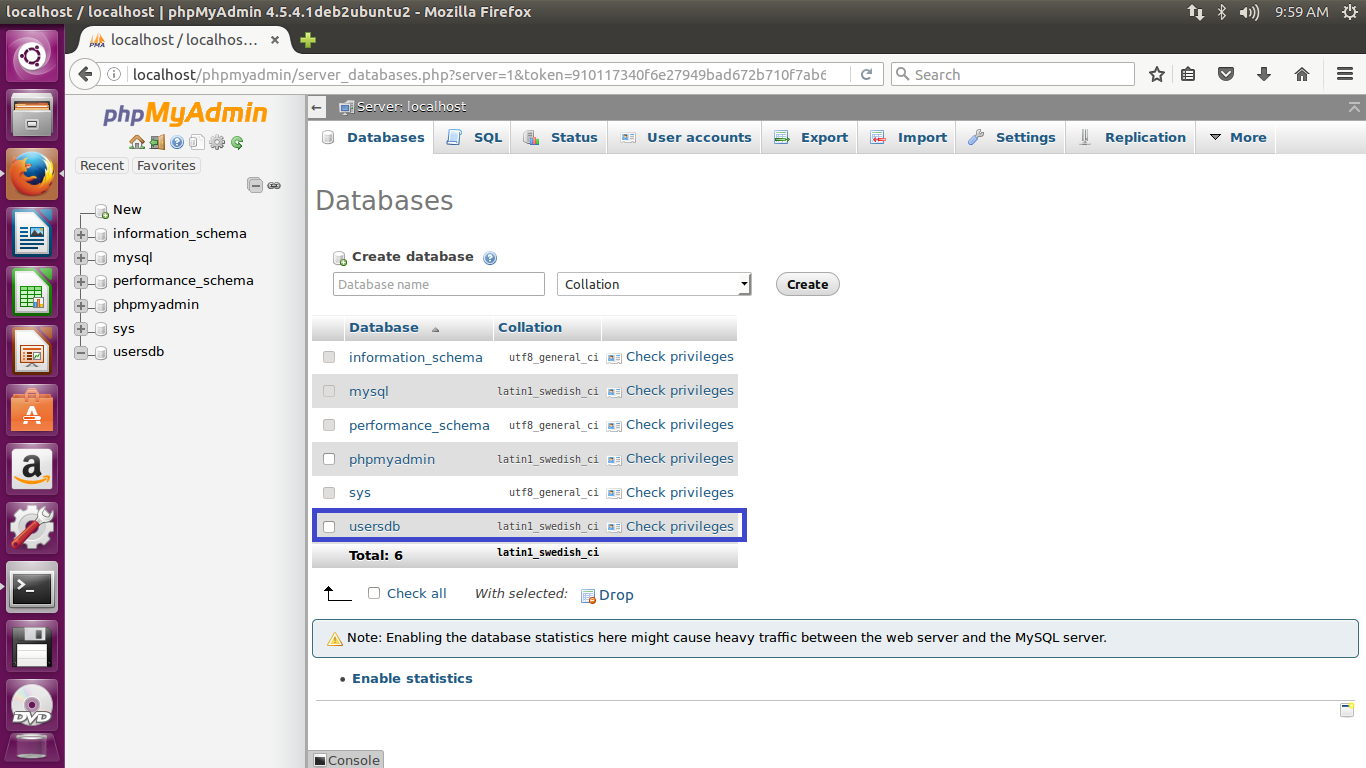
PHPMyAdmin Dashboard
This is how we can install LAMP Stack on Ubuntu 16.04.



thank you so much sir to provide step , it is very esay and helpful site, i like this site.
ItŌĆÖs my PleasureŌĆ”Keep visiting our website for more Linux Stuffs…
thanks
very well
thank you,simple and clear explanation…
it is helped a lot in in lab….
ItŌĆÖs my PleasureŌĆ”
Thank you very much for a perfect install.
ItŌĆÖs my PleasureŌĆ”
hey, can you help me? i have some problem at ŌĆ£php.iniŌĆØ file location may be different as per version bacause may version is different . i dont know which part i must to remove semi-colon
can you show me how to install racktables? i need your help.thank you
Definitely I will post a article on racktables and will inform you. Sorry for delay in reply.
Thank you Sahu.
It’s my Pleasure…