
BEST LINUX ALIAS COMMAND WITH EXAMPLES
Introduction
In this article we are going to discuss on Linux alias command. Alias is nothing but a another related simple name of something (Something in the sense it can be any thing like it can be a device, human being or may be something else). Here in Linux the alias means you can give a simple name to a command or we can say a command which is complex/lengthy to type each time for which we can set a simple name so that we don’t need to type the whole command again and again. just type the alias that you set for that command and at back end the alias will execute the command. In simple words we can use alias to create a shortcut for a command and set a simple string or a word for that command to remember that as per our convenient. The benefit of alias is you can set a simple string/word for a frequently used command. But mind it that alias doesn’t replace the command, it’s just a shortcut to that command.
Here I will show you how to create alias for a command and how to use alias command in Linux.
To list current aliases just run the command alias without any option or argument. Refer the command below.
[root@localhost ~]# alias   # To list current aliases
alias cp='cp -i'
alias l.='ls -d .* --color=auto'
alias list='ls -l'
alias ll='ls -l --color=auto'
alias ls='ls --color=auto'
alias mv='mv -i'
alias rm='rm -i'
alias which='alias | /usr/bin/which --tty-only --read-alias --show-dot --show-tilde'
we can create a new alias using alias command, The syntax would look like this :
Syntax : alias [alias_name]=[“Command for which you want to set alias”]
For example as we know that ifconfig command is used to check IP Address information. Here I am going to set alias for ifconfig as showip. That means when I type showip instead of ifconfig it will show the IP Address information. So let’s to that.
[root@localhost ~]# alias showip="ifconfig" # Set alias for "ifconfig" command
Now type the alias i.e. showip to check the IP Address Information.
[root@localhost ~]# showip
eth1      Link encap:Ethernet  HWaddr 00:0C:29:BE:FE:04
          inet addr:192.168.0.104  Bcast:192.168.0.255  Mask:255.255.255.0
          inet6 addr: fe80::20c:29ff:febe:fe04/64 Scope:Link
          UP BROADCAST RUNNING MULTICAST  MTU:1500  Metric:1
          RX packets:12 errors:0 dropped:0 overruns:0 frame:0
          TX packets:19 errors:0 dropped:0 overruns:0 carrier:0
          collisions:0 txqueuelen:1000
          RX bytes:2649 (2.5 KiB)  TX bytes:1945 (1.8 KiB)

lo        Link encap:Local Loopback
          inet addr:127.0.0.1  Mask:255.0.0.0
          inet6 addr: ::1/128 Scope:Host
          UP LOOPBACK RUNNING  MTU:16436  Metric:1
          RX packets:16 errors:0 dropped:0 overruns:0 frame:0
          TX packets:16 errors:0 dropped:0 overruns:0 carrier:0
          collisions:0 txqueuelen:0
          RX bytes:960 (960.0 b)  TX bytes:960 (960.0 b)
Let’s take another example :
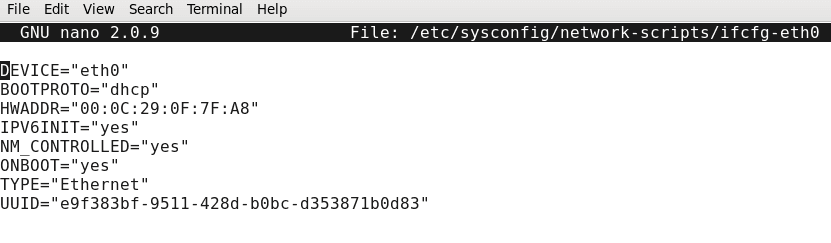
To configure IP address in linux we have to type the below command.
nano /etc/sysconfig/network-scripts/ifcfg-eth0
Instead of type such a long command again and again you can set a alias for the whole command. Here I am giving alias name as confip. Refer the below command.
[root@localhost ~]# alias confip="nano /etc/sysconfig/network-scripts/ifcfg-eth0" # Set alias for IP Configuration
Now run the alias i.e. confip to confirm if it’s working or not.
[root@localhost ~]# confip
Alias Command Examples
You can also set alias for command with it’s argument’s, for example rm -rf, where rm is the command and -rf is it’s argument. To set alias for such commands you have to enclose the command with it’s argument in quotes. Refer the sample output below.
[root@localhost ~]# alias deleteit="rm -rf"
[root@localhost ~]# deleteit test.txt   # Delete a file using alias
To list all configured aliases just run the alias command without any argument.
[root@localhost ~]# alias   # Check current aliases
alias confip='nano /etc/sysconfig/network-scripts/ifcfg-eth0'
alias cp='cp -i'
alias l.='ls -d .* --color=auto'
alias list='ls -l'
alias ll='ls -l --color=auto'
alias ls='ls --color=auto'
alias mv='mv -i'
alias rm='rm -i'
alias which='alias | /usr/bin/which --tty-only --read-alias --show-dot --show-tilde'
To remove or delete a alias you can use unalias command. Refer the command below.
Syntax : unalias [alias name]
[root@localhost ~]# unalias showip # Removing a alias
To remove all listed aliases use the unalias with argument -a.
[root@localhost ~]# unalias -a # Removing all listed aliases
Also Read :
- BEST RPM COMMAND ( REDHAT PACKAGE MANAGER ) WITH EXAMPLES IN LINUX
- BEST ZIP COMMAND WITH EXAMPLES IN LINUX
- COMPLETE UNIX COMMANDS AND BASIC LINUX COMMANDS WITH EXAMPLES FOR BEGINNERS
No doubt alias is a very useful command but still there is a problem in alias command i.e. if you logoff/restart the system then all your aliases will lost and you have to set all that aliases again. To avoid this you have to save all your aliases in .bashrc (It’s an hidden file which is located at home directory of each user) file to use it permanently.
you can check hidden files by using ls -a command.
[root@localhost ~]# pwd
/root

[root@localhost ~]# ls -a
.                .config    .gconf           .gvfs               Pictures
..               .cshrc     .gconfd          .ICEauthority       Public
anaconda-ks.cfg  data       .gnome2          install.log         .pulse
.bash_history    .dbus      .gnome2_private  install.log.syslog  .pulse-cookie
.bash_logout     Desktop    .gnote           .local              .ssh
.bash_profile    Documents  .gnupg           .mozilla            .tcshrc
.bashrc          Downloads  .gstreamer-0.10  Music               Templates
.cache           .esd_auth  .gtk-bookmarks   .nautilus           Videos
So let’s go ahead and edit the .bashrc file then enter your required aliases (Highlighted in Blue color below) in that file and save it. Refer the snapshot below.
[root@localhost ~]# nano .bashrc
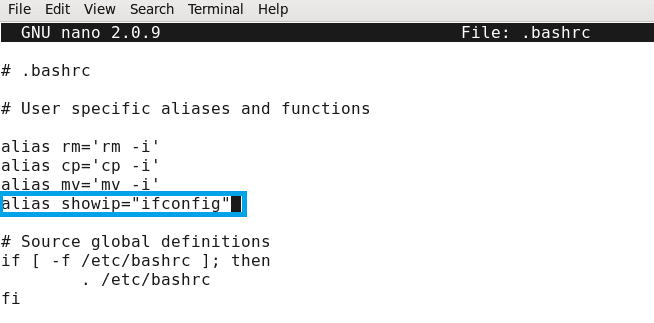
Save Alias in .bashrc file
One more thing we must notice is the alias is working in that user profile only in which we created it. For example I created the showip alias in root user login. Now let’s try to run that alias in some other user login.
Here I am logging with user elinuxbook.
[root@localhost ~]# su - elinuxbook
[elinuxbook@localhost ~]$ showip
-bash: showip: command not found
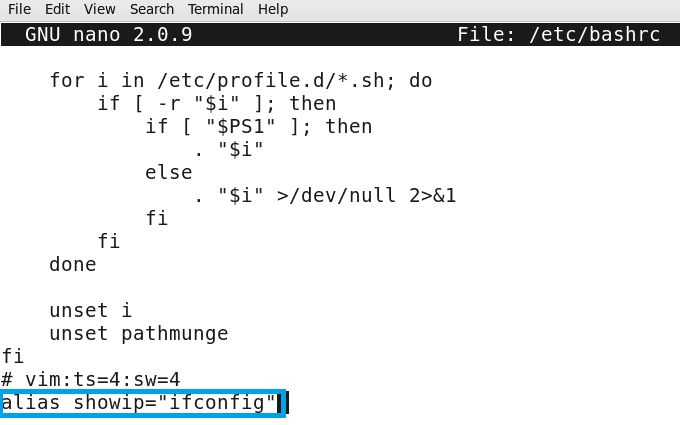
As you can see above system unable to find the alias. the reason behind that is we saved the alias in .bashrc file of root user and each and every user has it’s own .bashrc file. That means we saved the alias in .bashrc file of root user which is not concern with user elinuxbook. If you want to use that alias by logging in elinuxbook then either add the alias in .bashrc file of user elinuxbook or add it on /etc/bashrc file. Once you add the alias in /etc/bashrc file then it will be available for all users that you have in your Linux system and you don’t need to manually add for each and every user.
So to do so follow the below steps. First edit the /etc/bashrc file.
[root@localhost ~]# nano /etc/bashrc
After edit the file just go to the end of the file and enter your alias (Highlighted in blue color). Refer the snapshot below.
Now again login in user elinuxbook and try to run the alias, I am sure you will able to get the required output. Refer the sample output below.
[root@localhost Desktop]# su - elinuxbook
[elinuxbook@localhost ~]$ showip
eth0      Link encap:Ethernet  HWaddr 00:0C:29:0F:7F:A8
          inet addr:192.168.0.103  Bcast:192.168.0.255  Mask:255.255.255.0
          inet6 addr: fe80::20c:29ff:fe0f:7fa8/64 Scope:Link
          UP BROADCAST RUNNING MULTICAST  MTU:1500  Metric:1
          RX packets:698 errors:0 dropped:0 overruns:0 frame:0
          TX packets:492 errors:0 dropped:0 overruns:0 carrier:0
          collisions:0 txqueuelen:1000
          RX bytes:888135 (867.3 KiB)  TX bytes:38006 (37.1 KiB)

lo        Link encap:Local Loopback
          inet addr:127.0.0.1  Mask:255.0.0.0
          inet6 addr: ::1/128 Scope:Host
          UP LOOPBACK RUNNING  MTU:16436  Metric:1
          RX packets:16 errors:0 dropped:0 overruns:0 frame:0
          TX packets:16 errors:0 dropped:0 overruns:0 carrier:0
          collisions:0 txqueuelen:0
          RX bytes:960 (960.0 b)  TX bytes:960 (960.0 b)
Let’t Try some more Examples of alias command so that your concept will get more clear.
Example : 1
Create alias for passwd command. Refer the command below.
[root@localhost ~]# alias p="passwd"
Now set password of any user using alias of passwd command i.e. p
[root@localhost ~]# p elinuxbook   # Set Password using alias
Changing password for user elinuxbook.
New password:
Retype new password:
passwd: all authentication tokens updated successfully.
Example : 2
Create alias to check swap space.
[root@localhost proc]# alias swaps="cat /proc/swaps"

[root@localhost proc]# swaps
Filename                                Type            Size    Used    Priority
/dev/sda3                               partition       2097144 0       -1
Example : 3
Create alias to ping to some host, Here I am pinging to localhost.
[root@localhost proc]# alias pingme="ping -c 3 localhost"
[root@localhost proc]# pingme
PING localhost (127.0.0.1) 56(84) bytes of data.
64 bytes from localhost (127.0.0.1): icmp_seq=1 ttl=64 time=0.195 ms
64 bytes from localhost (127.0.0.1): icmp_seq=2 ttl=64 time=0.083 ms
64 bytes from localhost (127.0.0.1): icmp_seq=3 ttl=64 time=0.099 ms

--- localhost ping statistics ---
3 packets transmitted, 3 received, 0% packet loss, time 2000ms
rtt min/avg/max/mdev = 0.083/0.125/0.195/0.051 ms
You can check all above aliased using alias command without any argument.
[root@localhost ~]# alias
alias cp='cp -i'
alias l.='ls -d .* --color=auto'
alias listpart='fdisk -l'
alias ll='ls -l --color=auto'
alias ls='ls --color=auto'
alias mv='mv -i'
alias p='passwd'
alias pingme='ping -c 3 localhost'
alias rm='rm -i'
alias showip='ifconfig'
alias startftp='/etc/init.d/vsftpd start'
alias swaps='cat /proc/swaps'
alias which='alias | /usr/bin/which --tty-only --read-alias --show-dot --show-tilde'
We tried to include all possible linux alias command in this article, If something missed out please let us know so that we can include that also. If you found this Article useful then Like it, Share it, Subscribe our Site for more Linux Tutorials OR If you have any thing to say then feel free to Comment on Comment Box below.
Balamukunda Sahu
This is Balamukunda Sahu the Founder and Editor of ELinuxBook have 5+ years of Industrial Experience. I thankful to all our website viewers who encourage me to write quality posts and articals, Keep visit to our site and I will bring all latest Linux Tutorials, Updates and News for you.